Knifewear in Japan: Let's make a knife!
Making knives is really hard
Yeah yeah, I know. It kinda goes without saying. But for real. It’s really really hard to make knives how these guys make knives, and the steps and processes are a great deal more involved and intricate than I had bargained for. I’ve read a lot about blacksmithing. I’ve watched lots of videos, seen lots of pictures, and absorbed as much information as I possibly could before my trip. But damn. I still walked away with a pretty profound sense of “wow”! So let’s dive in!
Note: I’m not going to get super technical and use fancy words. I’ve done (most of) my due diligence and learned about austenites and carbides and that sort of stuff, but for the sake of you, dear reader, I’m gonna keep things digestible and easy to understand. You’re welcome.
The Hammer, the Forge
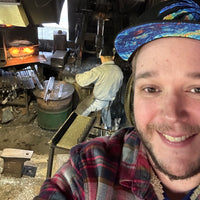
At Takefu knife village, and pretty much every other blacksmithing workshop in Japan, these are the two first (and most iconic) tools in the arsenal. A forge is basically a big ol’ oven that is used to heat up the rectangle of steel - or “blank” - in order to soften it up and make it malleable enough to pound out into a thin, tapered piece without it getting cracked or broken. The forge that I was working with was powered by an air-blower and little briquettes of coal which could be moved around with a little spatula-like tool. This allows the blacksmith to control exactly where the heat goes - if you bury your blank a little bit in the hot coals, specific areas will get heated up. Control is key! My teacher said we were aiming to get our blank up to 800 degrees. Keep in mind that there is no thermometer here - he was able to tell the temperature of the blank just by looking at the colour. Amazing.
Anyway, while the blank was heating up, he showed me the “template” of the knife we were going to make - a Bunka! My favourite! The template is basically just a piece of metal shaped like the knife we’re going to make. Basically, I needed to pound out our blank into a nice thin and straight sheet of steel that was just a little bit bigger than the template’s shape. More on this later…
Once our steel was nice and hot, it was time for hammering. I grabbed my tongs, and with my astute sensei’s guidance, I moved it over to the hammer - a ‘Springhammer” to be specific! A Springhammer is an important tool - think about a sewing machine with a foot pedal. Press on the pedal, and the needle starts to go up and down. Now imagine that the sewing machine is about 9 feet tall, and instead of a needle there’s a sledgehammer. And instead of a little hole for the needle, there’s an anvil. You get the idea.
Now, I know that this sounds cool, right? It sounds like it’s a ton of fun to pound an 800 degree hunk of steel with a gigantic mechanical sledgehammer. The very idea might seem insanely fun! Well guess what? It fucking is! It was straight up the coolest thing I have ever done! My teacher was very supportive - I basically tried to hold it as straight as possible and work in a snaking pattern around on the anvil. The idea is to get the blank thin, flat, and straight. You also want one side of the blank to be thinner than the other, as one is going to become the edge, the other will become the spine.
This was… not easy. This tool is incredibly powerful, and the foot pedal isn’t a simple on/off switch. It’s more like a gas pedal. The further down you push the pedal, the faster and harder the hammer will swing. Coordination between your upper body which is guiding the knife and your foot which is controlling the hammer is a lot easier said than done. Most of these blacksmiths are able to hammer out - or “pull” - the shape of their knife in one or two passes into the forge. Mine took… longer. But hey! We got there in the end! All done!
Frig ya
But no. Not done.
Cold Hammering
Hammer time is not over. Let’s jump back just a little bit and talk about the “blank” I’m working with. Most Japanese knives are not made out of just one type of steel. The blank I began with is actually made from three layers of two types of steel. Think of it as a sandwich - the two outside layers are made from softer steels. I know it’s strange to think of steel as being “soft”, but it’s true! Softer steels are utilized for applications that require a bit of durability and flex. We call this steel the knife’s “cladding”. The filling of our sandwich is made out of very hard steel - the word for the hard steel in Japanese is “hagane” (haa-GAA-ney). Hard steel is excellent at holding a nice sharp edge for a very long time. But very hard steel is also quite brittle and easily chipped. That’s why they put soft steel on the outside - it sort of acts as a shock absorber. This product is called “San Mai”, which literally translates to “three layer”. At Takefu, they purchase blanks that have been laminated together already. Forge-Welding steels together by hand is incredibly difficult and can be somewhat inconsistent, so most manufacturers purchase pre-laminated steel blanks. The name for pre-laminated “san-mai” blanks is “Riki-zai”. Anyway…
Up next comes the cold hammering. Knife in tong, we bopped on over to the other side of the workshop where they had the cutest little springhammers I’ve ever seen. Adorable sweet little babies! They were so small, that you had to sit on a little tiny stool to operate it, but they operated in much the same way. Now - this is where things became very difficult. Reader, you may not know this, but I am not small. I am fairly big. In Japan? I am a monster. A menace. Godzilla. Cold hammering on this cute little hammer was extremely difficult for me. I am both relieved and disappointed that there are no pictures of me folding my grapefruit-esque body in half in an attempt to bonk my knife into shape. My sensei had to take over. I made a valiant attempt.
A note on other workshops: cold hammering is really important at Doi-san’s workshop. His apprentice was taking care of the cold hammering while we were there. The anvil the knife was being hammered against was a little bit convex. This was done to give their single bevel knives a nice concave backside. Neat!
The point of this process is to further manipulate what’s going on inside the knife. We want the structure of the steel to be really nice and dense. A gentle but firm cold hammering is just what the doctor ordered! This little hammer also helps us straighten out the knife a little bit. We double checked to make sure that it was of a suitable thinness, then it was on to…
Shaping!
So forging, hammering, and cold forging are more or less universal steps around Japan. But when it comes to how the knife is actually shaped, we start to see quite a bit of variation from shop to shop. At Takefu, they are decidedly not messing around. They use a hydraulic press! This was the largest single piece of equipment in the workshop - It was easily about nine of ten feet tall. Think about a huge bunka-shaped cookie cutter. We very carefully placed our would-be bunka onto the cutting surface, stood clear, and pressed the button - it was actually two buttons you have to press at the same time to ensure no fingers are anywhere near the press! And then presto! Out pops a bunka shaped… thingie! I was aware that they shaped their knives using this kind of machine before, but I was absolutely flabbergasted by its size and sophistication. However, this machine does leave some pretty sharp edges on the knife, which we refer to as “burr”. We took our freshly pressed bunka and headed over to a large sandpaper belt to soften up these edges just a little bit, careful to get rid of any sharp burrs and imperfections.
A Note on other workshops: This was the only machine of its kind I saw on my whole trip - most workshops have a much more simple cutting machine that resembles a paper guillotine, but with several gears being utilized to give the operator a bit of a mechanical advantage. Steel is much harder to cut than a stack of paper! I saw this device being used at Doi-san’s and Tanaka-san’s workshops, but this tool is extremely common in most smaller workshops.
This is also where we did our engraving! We took a little field trip off to a spartan little room behind the actual workshop where my gracious sensei once again set up my favorite little tiny stool. Hooray! Because I have absolutely no idea how to use a hammer and chisel to engrave by hand, I used some little Romanji stamps and a small hammer to “pang” my name into the side of my knife! However, if you’ve ever been to one of our many engraving events when one of our blacksmiths visits our shop, you’ll see them engraving their knives by hand using some truly amazing little hand tools. After proudly spelling out “ O W E N '' into my knife, I rolled off my tiny stool and we headed back to the main workshop
A Note on other workshops: Many workshops use stamps and a hammer to engrave their knives. I felt that the most impressive of all of these tools I saw was at Moritaka Hamono in Yatsushiro. After impressing the whole family with a beautiful rendition of the officially licensed “Kumamon” song, they decided that my knife should be custom engraved with none other than the most famous bear in Japan himself. After hammering out my badass 240mm Kiritsuke, Takuzo Moritaka-san gleefully procured their “Kumamon” stamp. Kumamon and I shared the exact same dopey grins on our faces as Takuzo held the bear stamp on my blade while his Nephew prepared to swing a sledgehammer toward dear old uncle’s hands. When Takuzo was all set, he let out a mighty “HI!” and his nephew swung the hammer twice into the stamp! The blade, still hot from the forge, released a few dozen joyful sparks - and there he was, right there in the knife! Amazing.
 The Bear!
So what now? Grinding? Sharpening? Handle? No no no. We’re not done with the heat quite yet. Once the blade is hammered and cut into its desired shape, that’s when the heat treatment process begins!
What is Heat Treatment?
Heat treatment is a really complex and precise process, and it’s easy to get bogged down with all sorts of metallurgical terms like austenite, martensite, cementite, etc. While my knowledge of knives and steel is definitely much deeper than most people’s, I’m by no means a trained expert in the field. Metallurgy is immensely deep and complicated, and it’s something you could spend a lifetime researching and studying.
Earlier, I promised I wasn’t going to use a bunch of complicated science-y words. I know, I know… but right now? It can’t be helped. Sorry. We gotta anneal. I’m gonna try to chef-brain this for you to make it easy - at this point, my knife is basically a steak that has just seconds ago been removed from the pan or the grill. Do you cut into it and devour it right away? No! That would be silly! Let it rest!
This is where my analogy kinda falls apart because we need to let our knife rest under heat rather than at room temperature. At Takefu, annealing is done in a big specialized oven. We tossed my knife (along with a bunch of others) in and turned on the heat. This alters the steel’s structure slightly, and then cools down very slowly. Essentially, this gives the steel a much more uniform structure. Heat and hammering causes a great deal of stress inside the knife, and this annealing process helps relieve some of that pressure.
A note on other workshops: this is not the only way annealing can be done. It’s really tough to nail down exactly when people figured out that this heating up and controlled cooldown make steel behave differently, but we’ve been doing it for a while. When I was visiting Moritaka Hamono, a MUCH older knife workshop in Yatsushiro, they didn’t have a fancy annealing oven - they would simply heat the steel up until it was the right temperature, and then stick the knives into a vessel packed with straw ash. The ash acts as an insulator, meaning that the knives would cool down really slowly. I don’t know about you, but I find that incredibly fascinating! I’m always so impressed with that kind of really basic human ingenuity.
After the knife has cooled, it’s time for quenching. Aside from the actual hammering, I feel like this was the coolest part of the process! Quenching is an essential part of heat treatment, as it’s going to make our hagane incredibly hard, and hard steel makes for great knives! My teacher led me behind a little makeshift tent in the workshop that contained what looked like a super powerful gas oven with no door. At the bottom of the oven, there were a pair of burners, each shooting a blue flame diagonally toward each other. To the left of the oven, there was a bucket of mud made from water and natural sharpening stone slurry, and to my right was a large basin of water.
The first step was to dunk our knife into the mud! This mud acted as a sort of insulator which would help distribute the heat more evenly across the blade. After we coated our blade in the mud, we held it high above the flames at the top rack of the oven with our tongs to allow it to dry. Then, very carefully, we placed our blade spine side down between the two flames at the bottom of the oven, and drew the blade back and forth to evenly distribute the heat. Twenty-three seconds. He was incredibly clear about that number! I wonder how many knives they messed up over the years to get it so precise? Anyway, lo and behold, after exactly 23 seconds of intense heat, our blade was bright orange! I dunked the blade into the cold water for one very loud second, and then… done! Quenching achieved! The quenching process is actually pretty different depending on what type of steel you’re working with - my knife is made from “white carbon steel”, or “Shirogami” in Japanese. Shirogami blades are typically water quenched, but other types of steel can be quenched in oil (like “blue carbon steel” AKA “Aogami”), and most stainless steel (such as VG-10) is actually simply air quenched!
So now the knife is hard. Really hard. Maybe a little bit… too hard… hmm. Harder steel holds an edge exceptionally well, but you will definitely start to see some diminishing returns if it gets out of control. Hard stuff is also quite brittle! A knife that can stay sharp like crazy is not terribly useful if it gets chipped or broken just by looking at it a little bit too hard. So that means it’s time for tempering! There’s a lot of different ways to temper steel, but for most carbon steel knives, it’s done by submerging the blade in an oil bath that rests at 180 degrees. Basically what’s happening here is some of the carbon trapped in the steel is being released, thus changing the structure of the steel. It helps to relax some of the stress that gets built up during quenching and gives us a nice, hard (but not too hard!) knife that will hold an edge really well, but won’t break or crack super easily.
Phew! That’s a lot of steel chat! If your eyes glazed over while reading the majority of this, just remember the three basic steps of heat treatment:
- Annealing (heating and slow cooling)
- Quenching (heating and faster cooling)
- Tempering (Sustained medium-high temperature)
These three steps need to be taken in order to get the best out of any piece of steel before it’s ready to head over for…
Sharpening
Alright! My time to shine! Well… Kinda. I’ve sharpened literally thousands of knives in my years spent here at the shop, so for the first time in the workshop, I was feeling pretty confident! But the tools we have here at Knifewear are quite a bit different than what the folks at Takefu knife village (and pretty much the rest of our blacksmiths) use.The principles are pretty similar though. Basically, instead of flat wheels that spin like a record player, we were working with large vertical wheels around one meter in diameter that look a bit like big water wheels. There are some serious advantages to using these kinds of wheels, but due to their size, they aren’t terribly practical to have in our shops. The first advantage is that they’re very powerful. This one is kind of a no-brainer. These wheels have a lot of horsepower and spin really fast. Unlike our Hoyo wheels, you don’t need to be super concerned about straining the motor while working. But more importantly, these wheels make it much easier to get a “convex grind” on the edge of your knife. Let’s take a look!

It’s called “art”. Look it up.
Imagine you’re standing in front of this wheel. You are holding a knife perpendicular across the wheel. The goal is to establish a nice, consistent thin double beveled geometry along both sides of the knife, section by section. Pushing the blade far away from your body will give you a lower angle on your knife, and as you pull the blade towards yourself, you’ll have a higher sharpening angle. By starting to grind the blade at a point on the wheel closer to your body, you can begin to sharpen away the cladding steel until several millimeters of the “hagane” is exposed. Once you start to see this exposure, you can begin grinding the blade a bit closer to the center of the wheel, thus lowering the sharpening angle and thinning the blade behind its edge. By taking advantage of the wheel’s circular shape, you don’t need to adjust your sharpening angle by hand - you can simply hold the blade flat, and move it back and forth. You’ll be able to change the angle at which you’re sharpening the blade without having to adjust the angle you’re holding the knife. By using this kind of sharpening wheel, it’s possible to grind a really nice convex edge easily and quickly! After establishing my nice sharp geometry on the coarse wheel, we moved over to a higher grit wheel to polish out some of the scratches.
A convex grind is desirable on a kitchen knife. It makes it possible to get the edge really nice and thin, helps food release from the blade as you’re slicing, and keeps the blade from being too brittle! Winner winner, chicken dinner!
A Note on Other Workshops: While a nice convex is pretty much universally desired, some sharpeners do things a little differently. At Hado Sakai, Nomura-san would also hold the knife at a sharp diagonal angle (almost vertical) across the spinning stone. This flattens out the concavity just a little bit to make the bevel a bit more flat. Because he sharpens his knives with such a high bevel, they tend to become just a little bit concave on the bevel, and this helps flatten it out just a touch. One some knives, they would also grind the actual faces of the knife against this stone too. This gives a nice sharp shinogi line, in addition it makes the face of the knife slightly concave. This helps a lot with food release, as well as overall sharpness.

A Spicy Meatball! But the other side? Whoops... Look at the heel. D’oh!
This is called “overgrind”. Basically, I made a little boo-boo and ground the back of the knife a little bit too high. Oh well! What can ya do? It just goes to show that the only way to get good at something is to practice, and I’m looking forward to trying again. I personally found this wheel to be a ton of fun to use, and I can’t wait to get my hands on one again!
After the initial sharpening and polishing is performed on these sharpening wheels, there are a few different places the knife can go. For my knife (pictured above), we finished on a high grit sandpaper buffing wheel, followed by felt buffing wheel treated with a jeweler’s rouge - think about the same kinda green stuff you put on your strop. This is a really simple and effective way to get a nice semi-polished finish.
A Note on Other Workshops: There are a lot of different possible ways to finish a knife. An industrial sand blaster is frequently used to get a really nice and even finish on a whole lot of knives at Takefu Knife Village’s sharpening workshop, as well as at Takayuki Shibata-san’s workshop. The advantage with a sand blaster is that you don’t need to have a perfectly flat and even grind to get good results. The particles of sand will make an “efficiently” ground knife look great without a lot of work. At some fancier sharpening workshops like at Hado Sakai or in Yamatsuka-san’s shop, they’ll do their polishing with smaller wheels made out of a variety of material. I saw wheels made out of very high grit ceramic and hard woods treated with polishing compounds. At both Hado and Yamatsuka’s shop, I saw a lot of finishing and polishing being done without any wheels or the assistance from power tools whatsoever - a lot of this work was being done completely manually. My favorite was watching the little old fellow at Yamatsuka-san’s workshop. He put the knife into a special little jig (which looked like it was homemade) that held the knife steady against a flat work surface. Only a bit of the core of the knife would stick out of the contraption. He had a hunk of special wood that looked like it was probably older than me which he would vigorously rub against the Hagane for maybe 15-20 seconds, and it polished the knife up like crazy! Such amazing skill!
But the final step of sharpening always remains the same - the microbevel. I sharpened my microbevel by hand using a 3000 grit whetstone, but it’s much more common to see these sharpeners working with tools more similar to our Hoyo wheels, some of which were impressively large! After our high grit stone to establish the “micro bevel”, we gave it a quick strop. The very edge of the blade after doing all this work to get the geometry incredibly thin is actually really quick and easy. Because the blade is so thin after all the hard work we did already, it only takes a bit of work on a high grit stone to establish that nice polished edge.
Enjoy!!
I think it’s abundantly clear that I’m a pretty big fan of Japanese kitchen knives! I’m fascinated by the craftsmanship these people exercise, the traditions behind their techniques, and the beauty of the knives they produce - not just to look at, but to actually use. I cook pretty much every single day, and my knives get a real workout! Behold! Woof.
Woof.
One of the many things I absolutely love about my job is that my passion for the tools we sell actually helps fuel my passion for cooking. It also allows me to share these passions with my team at the shop, my friends and family, and most importantly, my amazing customers! I think it’s incredibly easy for someone to really get “lost in the sauce” when it comes to knives - sure, you can look at them as pieces of art or history. You can look at them as a collection. They can be “The Thing” you love. And I do Love them! But to me, at the end of the day, they’re also tools. Tools that are designed in a clever way. Tools that are designed to perform better than others. Tools that allow me to do “The Thing”! My Thing. For me, these knives are a means to an end. They are something that allows me to have fun doing something that brings me joy. And hell! The knives themselves bring me joy too!
My time in Japan was incredible - the food, the people, the mind-bogglingly huge cities, the natural beauty, the trains - it was a life changing trip. I consider myself to be incredibly lucky to be privileged enough to experience. But the most important part was being able to learn about these tools I love and work with every day that bring me so much joy in my kitchen. So please - never stop learning, and never stop asking questions. But also… enjoy! That’s the reason these knives exist!